How to open an SSH Port with the Firewall Manager
A step-by-step guide to whitelisting your SSH port in the Firewall Manager so you can connect to your server.

If you cannot connect to your server over SSH, the firewall is usually the first thing to check. Our network filters traffic before it reaches your machine, which is what keeps attacks out, but it also means you need to tell it which ports to let through. SSH is one of those ports.
The good news is that opening it takes about a minute in the Firewall Manager. Here is exactly how to do it.
Before you start
You will need to know two things: the IP address of the server you are connecting to, and the SSH port it uses. If you have not changed anything, the SSH port is 22, which is the default. If you set a custom SSH port when you configured the server, use that number instead.
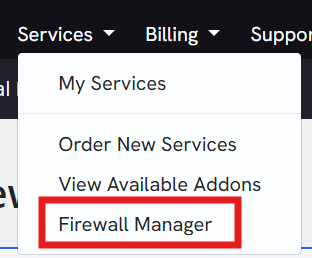
Step 1: Open the Firewall Manager
Log into the billing portal. In the top navigation, open the Services dropdown and select Firewall Manager.
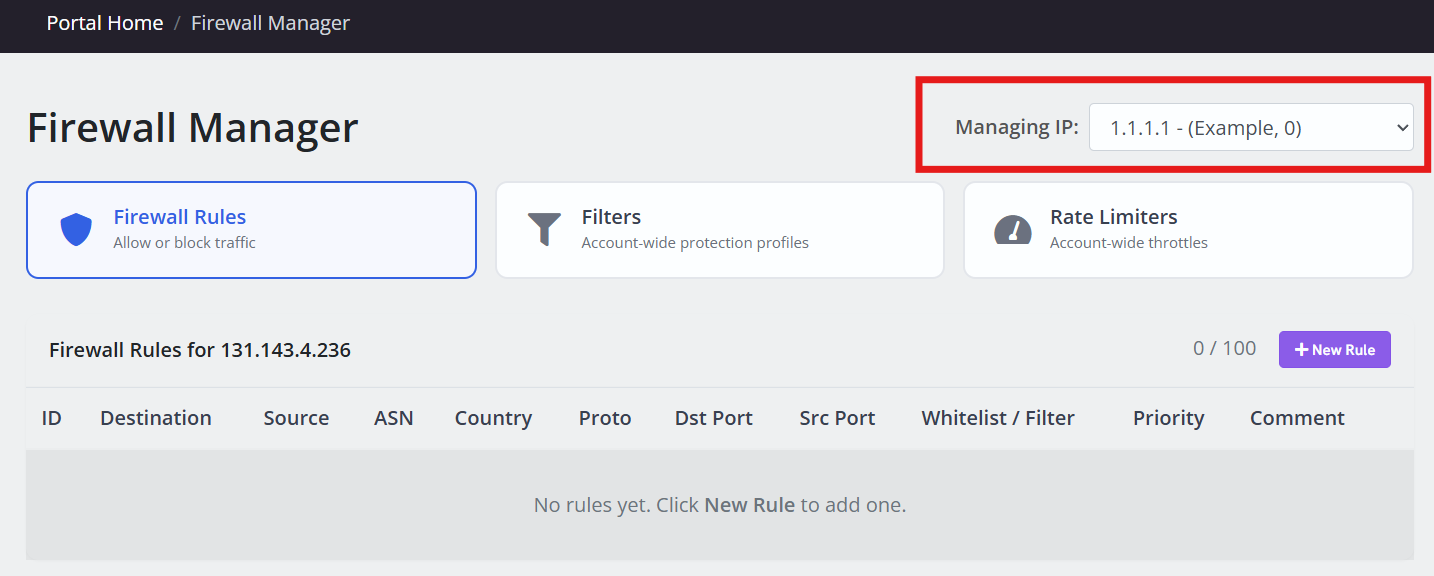
Step 2: Select your IP address
The Firewall Manager shows the IP addresses on your account. Click the IP address you want to add the SSH rule to. This is the address of the server you are trying to reach.
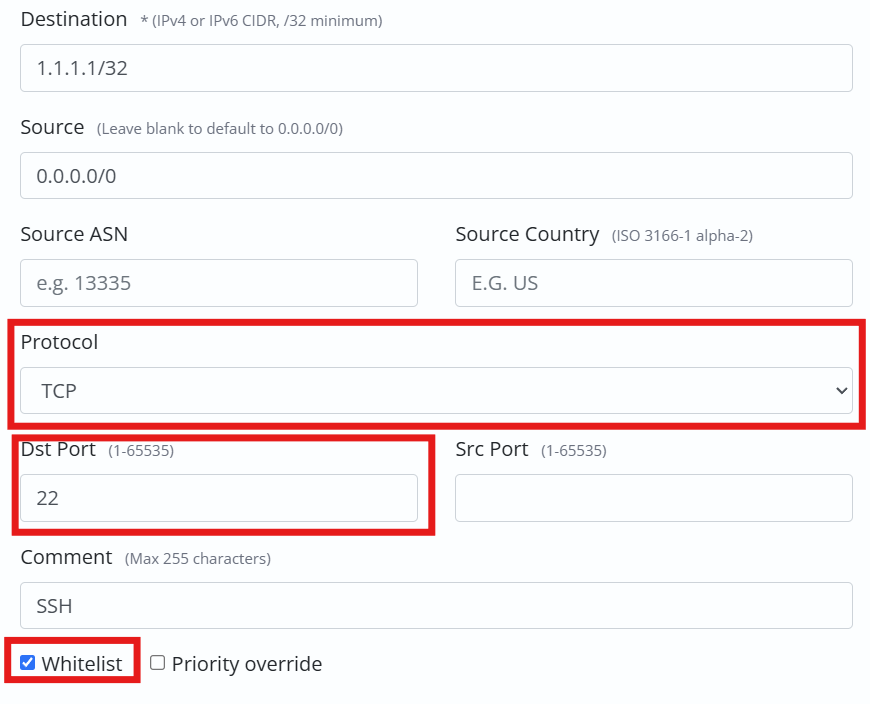
Step 3: Create a new rule
With the IP selected, click New Rule. This opens the form where you define what traffic to allow.
Step 4: Set the protocol to TCP
SSH runs over TCP, so set the protocol to TCP.
Step 5: Set the destination port
In the destination port field, enter your SSH port. For most setups that is 22, the default. If you changed your SSH port to something custom, enter that number here instead.
Step 6: Whitelist it
Tick the Whitelist checkbox. This tells the firewall to allow traffic on this port through to your server, which is exactly what you want for SSH.
Step 7: Create the rule
Click Create Rule. Your new rule will appear in the list for that IP.
Give it a few minutes
Firewall rules do not take effect instantly. They need to propagate across the network, which usually takes anywhere from 1 to 15 minutes. If you try to connect right away and it still does not work, wait a little longer before assuming something is wrong. This delay is normal.
Once the rule is live, connect as usual:
ssh youruser@your-server-ip
If you are using a custom port, tell SSH which one with the -p flag:
ssh -p 2222 youruser@your-server-ip
If it still will not connect
Most connection problems after adding the rule come down to one of a few things. Double check that the port in your rule matches the port your server is actually listening on. Make sure you selected the correct IP address, since it is easy to add the rule to the wrong one if you have several. And give it the full propagation window before troubleshooting further, because a rule that looks correct often just needs another few minutes to go live everywhere.
That is all there is to it. Once the rule is in place, your SSH connection will come straight through, and the firewall keeps doing its job filtering everything you did not ask for.